The job of the artist is always to deepen the mystery

......Francis Bacon

Tuesday, September 13, 2011

Homemade Laundry Detergent

In these tough economic times, making your own cleaning goods as well as growing your own food makes so much sense. I am going to share with you a recipe for making homemade laundry detergent. This is really easy to do and you will end up with a 10 gallon bucket of laundry soap which is all natural, with no petroleum products added. It is gentle and safe to use for babies and anyone with skin allergies.And it is also safe to use in those new fandangoed, HE, (high efficiency) washers too! The best part is, this 10 gallon bucket of laundry detergent will cost you under three bucks! Yep, you heard that right, under three dollars. This is what you will need....................


Make sure you get washing soda, not baking soda! It might be hard to find, I had to order my box online. I did find the Borax and the Fels-Naptha soap at my local grocery store. You do not have to use Fels-Naptha.  You can use a bar of Ivory soap or other mild soap instead.

You will also need a clean, 5 gallon bucket available for a couple bucks at your local hardware store.
A quart pot to heat everything up on your stove
A wooden spoon
a measuring cup
a cheese grater
water...........
and an empty commercial laundry detergent container like an old Tide container to store your detergent in.

First........grate your soap up into bits with your grater. Don't worry about using your grater for food afterwards, just wash it first. Fill your quart pot with 4 cups of water and add the soap flakes into the pot. Heat to just  melt the soap, stirring with your spoon,  DO NOT let this boil.

In the meantime, fill your 5 gallon bucket half full of plain water. No need to measure it, just "eyeball it". Once your soap is melted, add that to the water in the 5 gallon bucket.

Then to this you will add 1/2 cup of the Borax Powder and 1 cup of the Washing Soda. Mix this well with your spoon. Next, add more water to fill the bucket all the way to the top.

Now............you will let this mixture "set up" over night. The next day, you will find that the mixture has become thick and jelly like, this is normal. Once again, stir it up well with your spoon and fill your old Tide or laundry detergent bottle up half full with the mixture. cover and store the unused portion still remaining in the 5 gallon bucket.  Add water to fill the container up the rest of the way. You will need to shake this well before using it. All you need is 1/4 cup added to your wash. That's it! easy peasy!

  This detergent works really well. Your clothes will come out unscented and almost completely static free. If you do like a scent to your wash, you  can add a little bit of essential oils to the mixture. Look at all the money you will save and it's great for the environment too!  Happy laundering!


Tuesday, July 19, 2011

Whats Growing On?

Sorry, I have been away again. I don't forget that I have a blog to maintain, but I have had all my family, here in town, for the past couple weeks now. I have been able to see my grandson and he has grown so much!

  They are now back in Texas where they have just put an offer on their first home! We are so excited for them and for us too as we will probably be staying with them for a spell when we move out there ourselves.

  My youngest came in from Alaska too and her husband just arrived here last night. And as for my son, who still lives here with us, he is in Texas right now, testing for the Austin fire department again.

  I had to put my creative art time on the proverbial 'back burner" while they have all been out to visit. Chasing a 22 month old around is not easy and took a lot of my time, but I didn't mind, I just loved having him here.

  I do have some photos of my now, very large and still growing veggie garden. Besides my art, this is something I really love to do and it makes me feel good knowing I'm feeding my family this pure organically grown food just steps away from my kitchen!


These are my Tomato plants grown in 5 gallon buckets


Small decorative rock garden right outside my back door. if you look closely, you can see my friend climbing down my ficus tree, and the little mushrooms growing in my very fertile soil!

Tumbling Tom Tomatoes in a hanging basket

Yummy Yellow Squash!

This is Stevia, which is a natural sweetener. Tastes just like sugar but it isn't.

This photo is a little dark but it is the very long and deep front yard garden bed. I am growing Honeydew Melon, Zucchini, Bush Beans, Eggplant, Bell Pepper, Cucumber and Watermelon out here.

Front Yard Zucchini

  I am working on another Koi painting and I promise to get some photos of that up here soon too. One more week and my days will slow down enough to get some more art done. I hope you are all having a great summer!


Tuesday, June 28, 2011

A Garden In The Sun


Quite a few years ago, when my kids were little, I had a beautiful backyard garden. I can still picture it and I miss it so much so I decided to start another, right here and now in my smaller, urban backyard. We are also in the process of getting ready to put our house on the market. Texas is our destination. My daughter, son-in-law and grandson are there and that's where we want to be too.


  So I decided to use containers to plant some of my veggies in. I have also been planting in my front yard. I have watermelon, zucchini and bush beans growing strong out there now. I would LOVE to get rid of my water guzzling front lawn as well and just grow food but listing the house prevents me from doing that right now.


 And whats really cool about my backyard garden is that I have my mini studio out there as well, smack dab in the middle. So while I am creating my art, I am surrounded by glorious plantings of wonderful, organic vegetables and flowers, all grown from seed by me. No poisonous insecticides and no GMO's (genetically modified organisms) are used here.


  Here are a few great reasons to grow your own organic food year round...........taken from a great website, One Green Generation, check it out! The link is on my sidebar.


Ten Reasons To Grow A Four-Season Organic Garden

  1. Growing your own food reduces the distance your food travels from the farm to you (10 feet, say, versus 250-2,500 miles). That means you’re eliminating the petroleum products used in farming equipment, fertilizers, pesticides, packaging, storage, and transportation.
  2. By reducing the distance your food travels from the farm to you, you also reduce your overall carbon output, taking a bite out of your impact on climate change.
  3. In the winter when most farmer’s markets close up shop, you’ll still have fresh, tasty produce.
  4. When you grow your own food, you also know where your food is coming from (no weird salmonella strains in your tomatoes and spinach, for instance).
  5. Home grown food tastes many times better and has more vitamins and minerals than vegetables raised in a monocultural setting.
  6. You can choose to grow various heirloom crops that you just can’t buy in a grocery store.
  7. You can choose to grow crops that aren’t genetically modified.
  8. You can save seed and create different varieties that are best suited for your little backyard microclimate.
  9. Knowing how to grow your own food makes you much more adaptable to whatever economic or environmental hardship that comes your way in the future.
  10. And lastly, it’s fun, it tastes better, and gardening nourishes your soul.

So get out there and get growing. It's creative, it's good for the earth and it's good for you!

Thursday, June 2, 2011

Backyard Art In The Early Summer

Over this past Memorial holiday, I decided it was high time I set up my outdoor studio space. Just a small area where I can create some pastel works. I like to work outside when I create with pastels as the dust can be very messy.

  Using a small table and a beach umbrella, I now have a beautiful area to work in. The weather is great right now and the backyard is alive with a myriad of colorful blooming foliage. I used what I had on hand around the house so this area cost me zero $ to get up and running!  I LOVE it!

  Just look at all the color surrounding me.................... 


Bougainvilla


Morning Glory


Kalanchoe and Allysum


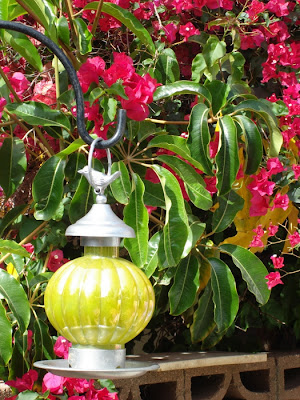
My birdfeeder, although, Skeezer, my little squirrel friend is the one who steals all the seed.

It is a very inspiring place to create art. I have just started working on this new pastel. I am almost finished getting it blocked in...........


16X20 on Ampersand Pastel Board

And another couple shots of my outside area.............


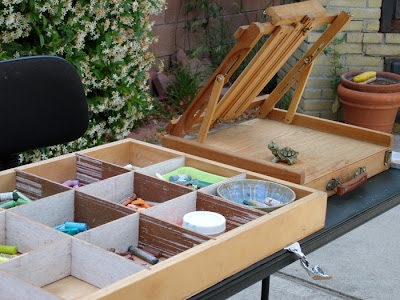
Above is how I store my soft pastels. Works perfect for me! Well thats it for now. Enjoy the photos and I will be back with more work soon.

Friday, May 6, 2011

Creating Happens.....New Studio Space

I am almost finished setting up my new studio space. It's a smaller area but until the big move to Texas, it will work just fine. I never realized just how much artistic supplies I had till I had to go through them!

  But before I show a pic of the new space, here are some new paintings in the works. The first one, is another one of my crows or ravens in progress. After having shipped my Raven Tryptich to Tennessee, I really missed it so I created another smaller similar piece. Yes.......I do miss my paintings when I sell them.


This is a 10X10 mixed media on canvas.

And here is a new painting just started this morning. I haven't painted koi in awhile so I thought it might be time for a new one. So far I am sketching in the rocks. Sometimes I will complete an entire sketch, fully detailed onto the canvas before adding color. Other times, I just take the paint to the canvas with NO preliminary sketch work at all. Depends on my mood and the subject I am trying to capture.


16X20 Intial Sketch in Progress

And now, a couple pics of my new space. I am not finished putting it all together but this is what I have done so far....................


We still have to put in carpeting and the walls have to remain white so we can put it up on the market, (I do love color though on my walls). You can see my Zafu and my Zabutan (meditation cushions)  on the floor in front of the alter where I do my meditation. The small Buddha on the table in the corner is a fountain. I love the sound of water!


And here is my drafting table. I purposely want it out and away from the wall so it doesn't leave any marks. It is pretty much in the center of the room. I use my small desk top easel on the drafting table. My very big studio easel is off to the left. As you can see, the window sill is missing. You can see it leaning against the wall in the corner behind my table. I;m still trying to get my son to install it.

It has a great view of my front yard and lots of light so that is a big plus, even though I did sacrifice a lot of space. Thats it for now, back to work for me!

Thursday, May 5, 2011

Student Work

This is a beautiful, large painting that a student of mine is diligently working on. Cheryl has been creating great pieces of art in my studio for over a year now. This painting is her first large one measuring 24 1/2 X 30. In the past, she has worked on much smaller canvases......

Cheryl is a great student and a very talented one. On top of painting, she also plays the piano and writes children's musicals.

  I offer private, one-on-one lessons weekly. For more information, Contact me!

Wednesday, April 20, 2011

New Work

Finally finished!.....A TRUE mixed media painting. Acrylic, Oil, Graphite and Charcoal on canvas..........


"One Crow For Sorrow"
16X20 Mixed Media

Original and Giclees available

Tuesday, March 29, 2011

Barn Owl

Oh my..........I have been busy.   Packing and clearing out the house is a lot of work. I need to sit in my studio and create to be able to relax. I miss my studio when I am not in it. My work is such an extension of who I am. I have finally finished the Barn Owl sketch. Done in two different graphite leads and charcoal. The initial sketch is really important. It will be the basis for the entire painting once finished. Color comes next and that is my favorite part, to watch a painting "come to life" is so exciting!


I have to work on another painting too.............


This one above. Still needs work and a background.............I will be working on these two today and post more progress later. Happy painting everyone!

Tuesday, March 22, 2011

We Are Watching You

These eyes follow you all around the room


"Overseers"

SOLD
10X30 Acrylic, Mixed Media Tryptich On Canvas

Thursday, March 10, 2011

A Little Warm-Up

These small paintings get my brain and fingers working early in the day. This one is titled "The Fledgling" This is also a new material to paint on for me. Made by Ampersand, it is called Stampboard. It has a very smooth surface and is great for scratching into.


"The Fledgling"
2 1/2 X 3 1/2 Mixed media on Ampersand Stampboard

I will have more of these small ones up on a regular basis. Just small daily paintings for warm up practice!

Tuesday, March 8, 2011

Framed And Hung

 I had a request to help a client hang a print of my painting, "Buddha In The Shadows" in her meditation room in her home. The framing and matting looks great with this painting and my client was ecstatic!


Everything matches beautifully with her decor. This was actually a surprise for her husband who by the way was very excited to see it.


And that is a photo of my art on the clients wall, along with my wonderful art agent Christy. I couldn't do it without you lady!

So all in all, a very happy customer. For information on my originals and my prints, just contact me. 

Thursday, March 3, 2011

Three Crows In A Row

Ok....Here is my initial sketch of the last crow for my tryptich. He is actually the first crow in the painting, nothing like going backwards but it worked! The viewer reads from left to right so the inward facing first crow commands the viewer to pan across all three canvases, keeping him in the painting peripheral, so to speak. So compositionally, it works.


And the three canvases next to one another..................


Here you can see how the first crow leads the eye to the other two, in one fell swoop. I will get this new sketch based in and then I will add all the final details. Back to the studio I go and I will have a brand new sketch for a new painting up soon! Thanks for viewing.

Tuesday, March 1, 2011

Developing A Little At A time

Here is more progress on My Lady With Crow painting. The process I use on these paintings take a bit more time to create. I't's done using multiple layers of color, beginning with thin washes and building up into using thicker strokes.


You can see the light washes and more detail here in this closeup.............

I am putting her aside today to work on the crow tryptich. But I will post more as I work on her later.

Friday, February 25, 2011

Layer By layer

 Thats how I'm working this painting. layer by layer. Here is the initial color going in. This will have to dry completely before adding any details.


This is a 16x20 canvas, mixed media. A new technique for me and I really like the results so far. More progress to follow. I have a couple paintings to varnish while this one dries. Be back with more later.

Thursday, February 24, 2011

Three In A Row

I have put my second sketch down onto my canvas for my crow tryptich. It may be hard to see as it's just the initial sketch but soon it will have color. This canvas will be the third canvas in the group with my first sketch being placed in the center of the mix. I sometimes do this with my multi panel pieces. I will move them around to see in which order I like them best.


This last crow is further down on the branch so consequentially, he is closer to the viewer so,ie, he is a bit larger. He is also engaging the viewer as is the second crow. So far, the first crow 's eyes follow me around my studio as I work, very cool.

  I have one more canvas to prep and the last crow to sketch so it's back to the studio for me. Stay tuned for more progress on this one.

Wednesday, February 23, 2011

Ready To Add The Beauty

I think I have this sketch the way I want it finally. I am going to now add the beauty part, color! I LOVE this part..........


 She is on canvas. I will lay subtle washes of color over her and give her a background. I will post more photos later. Thanks for viewing!

Monday, February 21, 2011

Working Away On A Monday Morning

Here is a progress shot of my fourth lady in my "Fearless Diva" series. It's so great to be able to wake on a Monday morning knowing I am going to spend my day, in my studio, creating art. I just follow my bliss!


The sketch.................


Laying in the first color

As you can see, a painting is going to look pretty flat and one dimensional until the depth is put in. Thats the secret, be fearless!........ get those darks in there! More progress to come, keep checking back.

Thursday, February 17, 2011

Just A Little Addition

I have been staring at this canvas for a couple days now, trying to decide just what to add. After coming up with all kinds of ideas, I settled on a book. I will have her reading! So that is what I did. I added a book to my sketch.

  If I wasn't so busy, I would like to pick up a book and read too. But, I will be happy just painting her reading. Here is the before and after pics. I really think it added a lot to the composition.


 Now to add some color! I will post more later.

Wednesday, February 16, 2011

Enlightened And Enchanted

Finished!


"Buddha In The Shadows"
18X24 Acrylic, Mixed Media On Canvas
Giclees Available, Contact Me For Pricing

And A Closeup...............


Enjoy Your Week!

Monday, February 14, 2011

Buddha In Progression

Happy Valentines Day to all you lovers out there!  Iv'e been working on this new Buddha, the fourth painting in my "Enlightened Buddha" series. I'm actually trying to pull back into a consistent color palette. 

  I love my vivid jewel tone palette with lots of the quinacridone colors. But I also have a second color palette that I adore too, consisting mainly of blue shades. For now, I am going to stick to the quin palette and see what happens. Here is the progression of this work.......... 

Initial Sketch done in charcoal direct onto the canvas and fixed with fixative.


The.......Starting to lay in color. Just basing in.


As I am laying in more color. I am also paying attention to where I will place shadows and in what direction the light is coming from. You can see in this photo how I am applying that.


The color is spectacular on this painting. I am using Quinacridone Crimson for Buddha. Not a usual color for Buddha but then,  I don't usually use quote "Normal" colors unquote.Hopefully, I will be finishing this painting up today. I have other canvasses prepped and ready to go with sketches already on them. I will post those up here later as well. Thanks for visiting!

Saturday, February 12, 2011

Windy Wreck

It is still a bit breezy here in So. Cal. I sure wish it would stop. But at least I finished my 3rd Fearless Diva......


Here is the initial sketch...............And here is the finished painting.............


"Windblown"
14X18 Acrylic, Mixed-Media On Canvas
Third In The Fearless Diva Series
Giclees Available

Have more canvasses sitting and waiting for me. catch you all later. have a great weekend!